If you read my post “How to Use a Planner to Get Organised” then you already know that being organised takes time. Aside from the daily “visiting hours” I wrote about in that post, I also have a planning session before the start of each new week, and each new month.
Today I’m sharing how I prepare my planner for the month ahead.
Preparing for the Month Ahead
My monthly planning session has 3 simple steps, some months will naturally be more complicated than others, but this process should give you a good place to start.
Step 1: Separate Your Weeks
This first step has been a huge time saver for me.
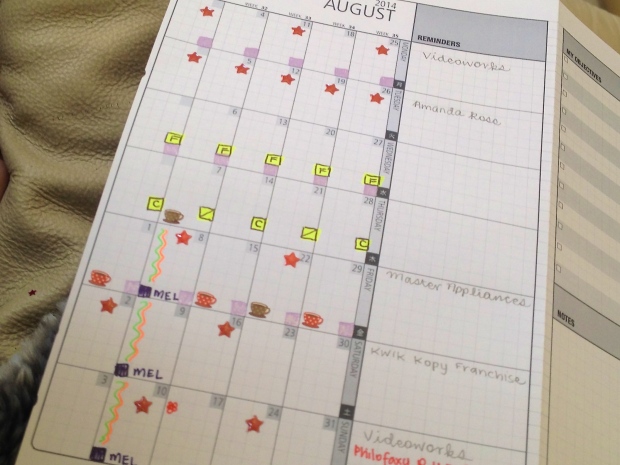
Having daily pages – or in my case, day on TWO pages, means that you have a lot of pages in your planner each month.
When I was first transitioning from my week on two pages set up I found it very frustrating flipping between pages and often wasted a lot of time trying to find the right page. So, I created this system to help me easily identify each week in the month.

Each weeks get a different colour so that I can more easily find any date I need.
For people who have a week on 2 pages, this system could still work for differentiating between the months in your planner.
You could also do it on the side edge, but I like to keep that blank so I can still use the DIYfish indexing system.
Added bonus – it makes your planner look extra pretty!

Step 2: Customise Your Pages
One of the things I love about the DIYfish inserts is that they are so plain, which sounds like a bad thing, but it actually makes them really customisable for whatever you need.
My monthly prep includes washi taping the blank second page into sections to make it more usable for what I need.

I also use a custom stamp from Etsy to put my daily tracking prompts.

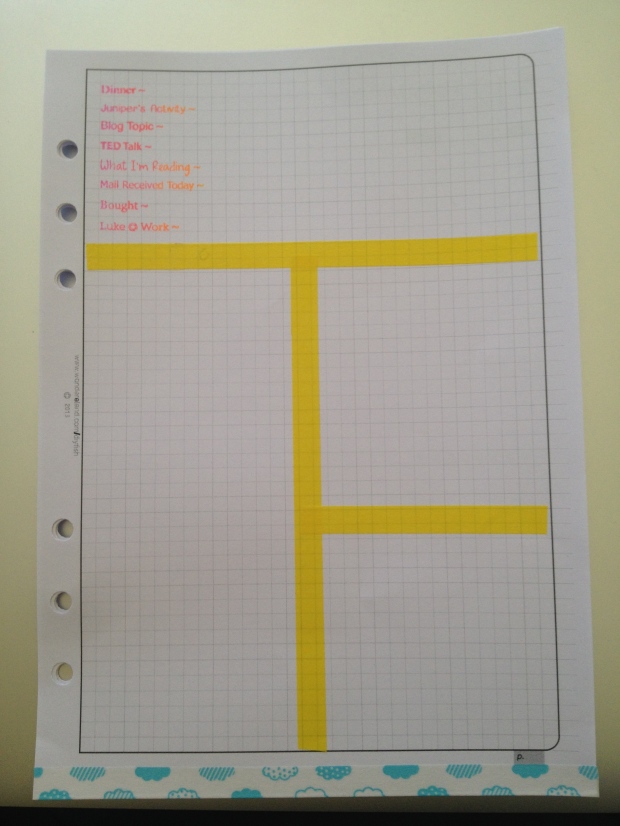
I also add some little motivation stickers and stuff like that. Some people like to theme out their pretty pages, but I am far too style challenged to do that!
Step 3: Transfer Your Information
I have three places where I store information that needs to be put into my inserts at the start of each month.
- Monthly Inserts – I only have one month at a time of daily inserts in my planner, but I keep an entire year of monthlies in there so the monthly pages collect a lot of information as I go.
- Important Dates – I have a page entitled “Dates to Remember” in my planner. On that page I write anything that will need to be scheduled, but isn’t necessarily important enough to go into my Monthly page. So, appointments that need to be made, but don’t have a set day yet, or general tasks that won’t fit in the small monthly page.
- Perpetual Calendar – I keep my Erin Condren perpectual calendar in the back pocket of my planner. It has all of my important recurring dates throughout the year – birthdays & anniversaries mainly. When adding these dates to my planner, I not only put a note on the date itself, but also a reminder the week before to get a card or gift.

These 3 small steps give me a great foundation for planning throughout the month.
Next up I’ll show you how to use this foundation to help with weekly goal setting, priority planning and daily tracking. Make sure you follow the blog so you don’t miss out – and remember to become a fan of the Peaceful Parent Facebook Page.

Love the way you did the edges of the weeks. That’s a great idea. Also love how you divided up the notes page. I may have to try that. I like “boxes”, too. And the stamp is amazing. I want one of those!
Love, love, love your blog and planner information! Totally motivating me to plan! I love how you set up for the month and prep your pages. My set up includes a year worth of tabbed monthlies (month on two pages and the months must be tabbed!), about two months of week on two pages, and each week I insert week’s worth of dailies. Thank you for informative posts!
Love this! I will be putting some of these ideas to use! Thanks for sharing!
So helpful, thank you! Can you post a link to the Etsy shop where you bought your custom stamp? Many thanks! 🙂
Sure – the esty seller is https://www.etsy.com/shop/SayaBellStamps?ref=l2-shopheader-name
Thanks, Nikki! xo